Content
- 1 Mastering the easy 2-ingredient sour cream recipe for rich, tangy results
- 2 The science behind homemade sour cream: fermentation and kitchen chemistry explained
- 3 Ingredient choices and customization: perfect your sour cream’s flavor and texture
- 4 Troubleshooting and storage tips to perfect your homemade sour cream
- 5 Comparing homemade sour cream with commercial options: cost, taste, and quality
How to make sour cream at home with just two simple ingredients unlocks a world of fresh, tangy delights right from your kitchen. This straightforward DIY solution offers a delightful alternative to store-bought tubs often filled with preservatives and stabilizers. With merely heavy cream and a splash of acid, like lemon juice or white vinegar, anyone can master the art of homemade sour cream. This natural fermentation transforms everyday cream into a thick, luscious topping classic in countless recipes. For those seeking frugality and food autonomy, this method embodies the spirit of homesteading—nurturing family meals with wholesome ingredients and reducing reliance on processed foods.
At its core, the magic of making sour cream at home lies in the interaction between cream’s fat and proteins and the acid that initiates fermentation. As the acid gently thickens the cream during a restful countertop wait, the result is a smooth, vibrant product free from artificial additives. This technique leverages kitchen chemistry, making it accessible to anyone willing to engage in a little patient cooking. It’s a perfect skill for creating fresh dairy staples, adding richness and tang to dips, dressings, soups, and baked goods.
From choosing the right type of cream to troubleshooting thickness issues and exploring vegan alternatives, deep knowledge complements this simple recipe. Embracing this homemade approach not only enhances culinary creativity but also deepens connection with the food preparation process, a joy well worth savoring in 2025 and beyond.
Key points to remember for your homemade sour cream adventure:
- 🥛 Two ingredients: heavy cream and acid (lemon juice or vinegar) enable a quick, natural fermentation process.
- ⏳ Patience is key: resting the mixture at room temperature for 12-24 hours allows thickening and flavor development.
- ❄️ Final chilling: refrigeration enhances the creamy texture and mellows the tang.
- 🧴 Free from preservatives: pure and clean with no artificial additives or stabilizers.
- 🍽️ Versatile uses: perfect for enhancing dips, baked goods, sauces, and classic toppings like tacos or baked potatoes.
Mastering the easy 2-ingredient sour cream recipe for rich, tangy results
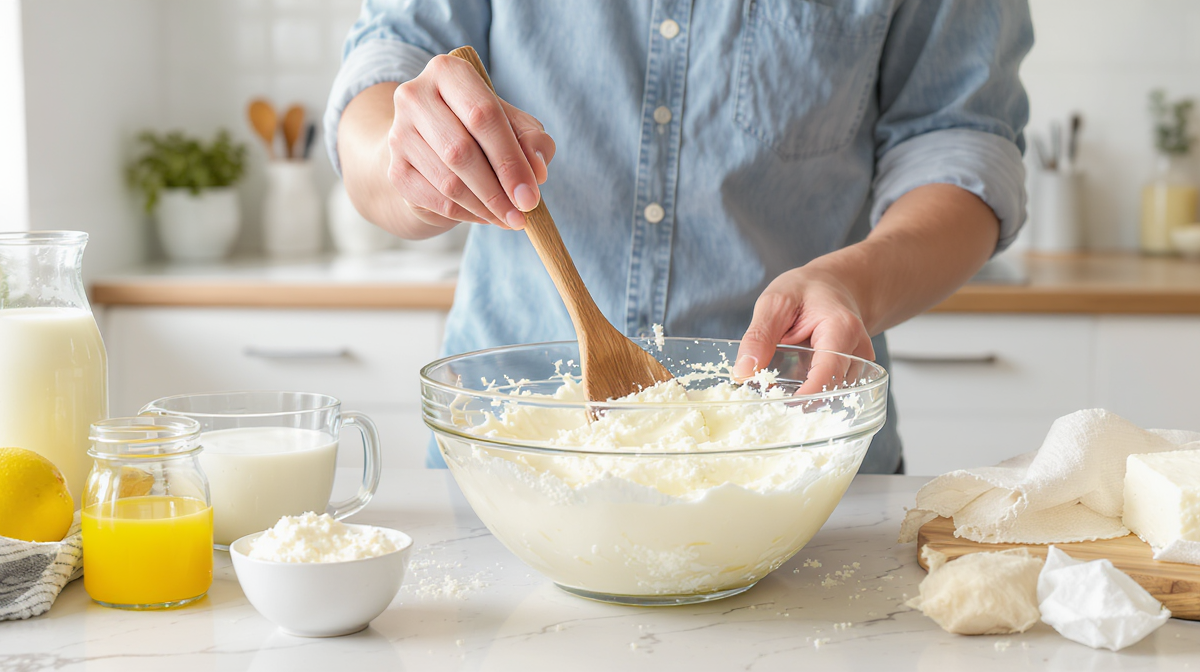
Creating your own sour cream at home demands surprisingly little — just two ingredients and some simple steps that anyone can follow. Heavy cream serves as the luscious foundation, its rich fat content delivering the characteristic creaminess sought in sour cream. Pairing this with a small amount of acid, traditionally lemon juice or white vinegar, sets off a gentle fermentation, transforming the cream into a silky, tangy delight. This method skips any cooking or complex dairy cultures, making it accessible for busy kitchens or frugal homesteads.
Start with a clean glass jar to maintain purity and prevent unwanted bacteria growth. Into this, pour exactly one cup (240ml) of heavy cream — aiming for 36-40% fat delivers the best thickness and richness. Add one tablespoon (15ml) of freshly squeezed lemon juice or distilled white vinegar, depending on your flavor preference. Stir gently for about 15 to 20 seconds to evenly distribute the acid without overmixing. Too vigorous mixing can disturb the delicate process.
Cover your jar loosely with either its lid set ajar, a coffee filter, or a piece of cheesecloth secured with a rubber band—allowing air to circulate. The jar then rests at room temperature, ideally between 70-75°F (21-24°C). This stage is the crux of transformation, as the acid interacts with the proteins, gently thickening the cream over 12 to 24 hours. Warm environments expedite this process, so positioning the jar near a stove or warm corner can help during colder months.
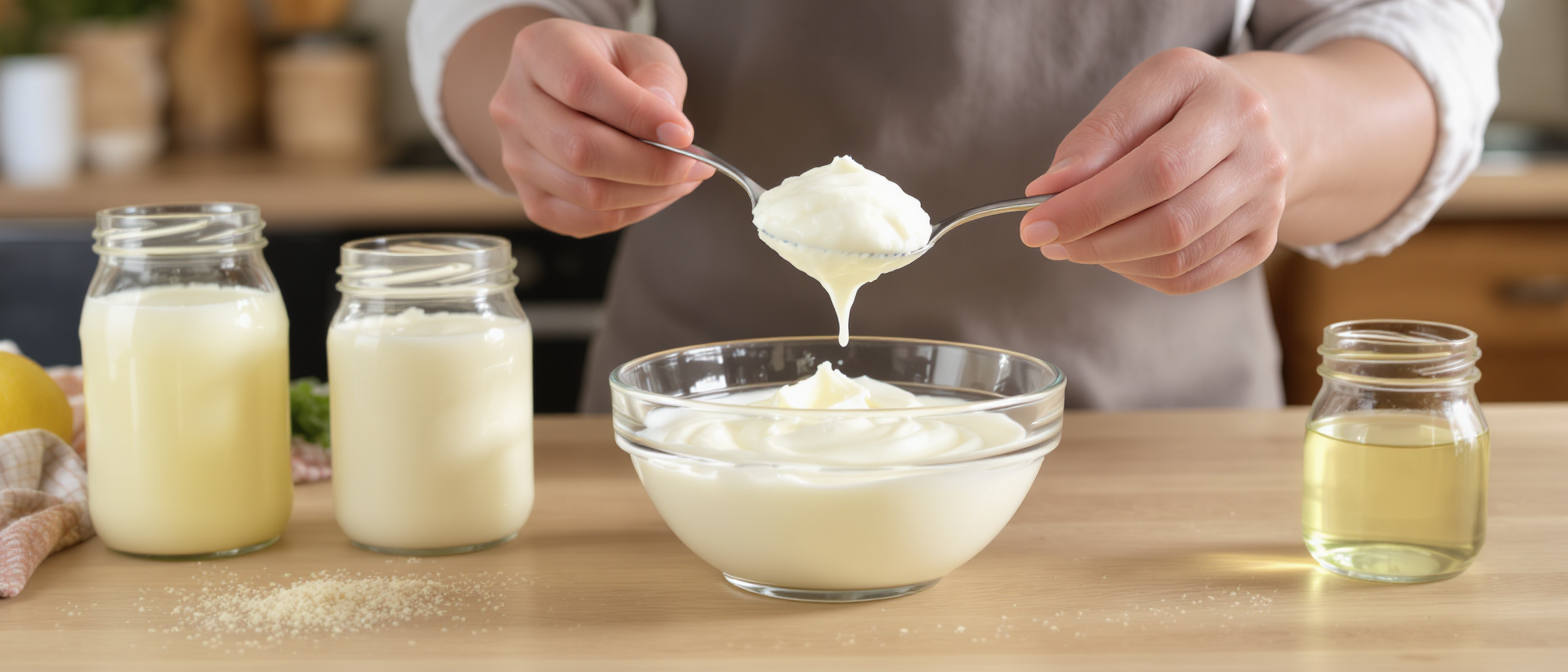
Once the cream achieves a yogurt-like consistency, a final refrigeration step for at least 6 hours, preferably overnight, firm it into the classic sour cream texture. This chill is critical; it stabilizes the fibers formed during fermentation, enhancing creaminess and reducing acidity’s sharpness. The resulting homemade sour cream is luxuriously thick with a fresh, tangy punch that supermarket versions often can’t match. It’s ready to elevate everything from hearty chili to gourmet dips.
The science behind homemade sour cream: fermentation and kitchen chemistry explained
The delightful transformation from cream to sour cream hinges on fascinating food science, primarily the interaction between dairy proteins and acids. Heavy cream is packed with proteins called caseins, which are sensitive to changes in their environment. When acid is introduced, whether lemon juice’s citric acid or the acetic acid of vinegar, it slightly lowers the pH, an essential factor to unlock fermentation’s magic in your kitchen.
This pH drop causes casein molecules to unfold and bond, forming a delicate gel matrix that thickens the mixture—a process known as coagulation. Unlike curdling that creates granular texture, the acid-souring method here produces a smooth, velvety texture prized in sour cream. This pseudocurd structure traps air and moisture, contributing to the characteristic creamy mouthfeel and fluffy appearance.
In commercial sour cream production, bacterial cultures such as Lactococcus lactis consume lactose sugars in cream, producing lactic acid gradually and creating complex tangy flavors. The two-ingredient method swaps these cultures with direct acid addition, speeding up the souring while still delivering delightful acidity and thickness.
Allowing the cream to sit at room temperature isn’t merely a safety risk turned necessary step—it’s where enzymes and gentle acid action exponentially improve texture. The warmth activates proteins to bind more efficiently, creating a creamier body. Additionally, the acidic environment inhibits harmful bacteria, making the practice safe when hygiene and container cleanliness are observed.
This understanding arms home cooks and aspiring homesteaders with confidence to troubleshoot the process. For example, a failure to thicken often signals insufficient fat content or too cold an environment. This kitchen chemistry is a beautiful example of leveraging natural fermentation, a technique that goes hand in hand with making homemade ricotta cheese or exploring pals like cream cheese recipes, enriching the homemade dairy repertoire.
Ingredient choices and customization: perfect your sour cream’s flavor and texture
While the base recipe involves only heavy cream and acid, experimenting with types of cream and acids can unveil a spectrum of textures and tangs tailored precisely to your taste and culinary needs. Fat content reigns supreme in determining texture, richness, and final product creaminess.
| 🥛 Cream Type | 🧈 Typical Fat % | 🎯 Resulting Texture | 🍳 Best For |
|---|---|---|---|
| Heavy Cream / Heavy Whipping Cream | 36-40% | Very thick, rich, and decadent | Dips, dollops, baking, all classic uses |
| Whipping Cream | 30-35% | Slightly less thick but still creamy | Most uses except thickest dollops |
| Half-and-Half | 10-18% | Thin, more like crema or thin yogurt | Light sauces or drizzling, not thick dollops |
When choosing your acid ingredient, keep in mind the subtle flavor nuances they impart. Fresh lemon juice lends a bright, citrusy zing, ideal for Mexican dishes or salads where a fresh pop works wonders. Conversely, white distilled vinegar contributes a clean, sharper sourness similar to commercial sour creams, making it the go-to for a more traditional flavor profile.
Vegan alternatives have grown in popularity, especially as more households seek dairy-free options. A common DIY approach blends soaked cashews with lemon juice, apple cider vinegar, and water to simulate sour cream’s richness and tang. If you’re intrigued by dairy fermentation, homemade cheesecake fillings or creative plant-based recipes might also inspire your kitchen experiments.
Troubleshooting and storage tips to perfect your homemade sour cream
Even seasoned cooking enthusiasts can face challenges with homemade sour cream, but most setbacks have simple fixes with the right know-how. Understanding common pitfalls turns kitchen mishaps into learning experiences.
- ⚠️ Why isn’t my sour cream thickening? Often, the culprit is low-fat cream like half-and-half or the kitchen being too cold. Opt for heavy cream and find a warmer spot in your kitchen for fermentation.
- ⚠️ Sour cream tastes too vinegary or lemony? Excess acid can create a too-sharp tang. Chilling the cream often mellows this flavor; use leftover batches in cooked dishes like creamy soups or dressings.
- ⚠️ Is it safe to leave cream out? Yes! The acid creates an inhospitable environment for harmful bacteria. Just use clean equipment and cover loosely to allow airflow.
Proper storage is imperative to preserve freshness and texture once your delight is ready. Keep homemade sour cream in a clean glass jar with a tight lid, refrigerated in the coldest part of your fridge. Expect it to last around 7-10 days, shorter than commercial counterparts due to absence of preservatives. It’s common to see whey separate on top; simply stir it back or drain if preferred.
For inspiration, try this sour cream alongside cherished comfort foods or creative dishes like tacos topped with lively homemade sour cream, rich dips, or even inside baked goods like breads or scones to add tenderness. When you’re ready to expand your kitchen skill set, learning to make traditional Indian fry bread or exploring canning homemade tomato sauce are excellent next steps in culinary self-reliance.
Comparing homemade sour cream with commercial options: cost, taste, and quality
For many, the question revolves around whether making sour cream from scratch is worth the time against grabbing a prepackaged tub. The answer lies in multiple factors affecting cost-efficiency, flavor satisfaction, and ingredient control.
Financially, while heavy cream carries a higher upfront price than sour cream tubs, a single carton typically produces two to three times the typical store-bought quantity. Frequent cooks and those passionate about frugal living find homemade sour cream a worthy investment, especially when considering the joy of reducing plastic waste and controlling exactly what goes into their food.
| 🔍 Feature | 🏠 Homemade Sour Cream | 🛒 Store-Bought Sour Cream |
|---|---|---|
| Ingredients | Heavy cream and lemon juice or vinegar only | Includes stabilizers, preservatives, and additional dairy derivatives |
| Flavor | Fresh, bright, natural dairy tang | Often muted or artificial, varies by brand |
| Texture | Rich, thick, creamy with slight natural variability | Uniform and smooth but sometimes gelatinous |
| Control | Adjust fat content and acid source to personal taste | Limited to full-fat or light options with additives |
In summary, homemade sour cream offers an authentic and wholesome culinary experience, appealing especially to anyone committed to natural ingredients and kitchen independence. Its convenience coupled with superior quality proves a staple worth adding to the repertoire of sustainable cooking.
Can I use whipping cream instead of heavy cream?
Whipping cream with 30-35% fat can be used, yielding a slightly less thick but still creamy sour cream. Heavy cream is preferred for the richest texture.
Is it safe to leave the sour cream mixture out at room temperature?
Yes, as the acid lowers the pH to prevent harmful bacteria growth. Use clean equipment and cover the jar loosely for airflow.
How long does homemade sour cream last in the fridge?
Up to 7 to 10 days when stored in an airtight container in the coldest part of the refrigerator.
Can I make sour cream vegan?
Yes, by soaking cashews and blending them with acids like lemon juice and apple cider vinegar for a creamy, tangy vegan alternative.
Why isn’t my sour cream thickening after 24 hours?
Possible causes include using low-fat cream, a too-cold environment, or insufficient acid. Try using heavy cream, warming the location, and ensuring the right acid ratio.